This is the second blog in a series on integrating Oracle’s Cloud Product Hub offering. As mention in the prior blog, Oracle Product Hub Integration Blog Series: Introduction, those looking to integrate product hub to other enterprise systems have two primary methods of pulling information out of Product Data Hub: Publishing Framework and Integration Cloud Services. This blog will walk through the setup of a spoke system and scheduled process to produce an item export. This is the same set of steps that could be used as a starting point for your company’s integration.
Create a location for the data files
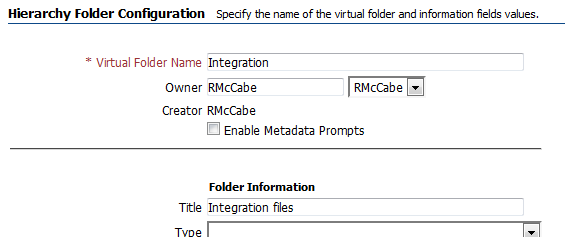
The first step we will take is to create a location for the publishing framework to place our exported content. For this we will leverage WebCenter, often referred to as the content server.
- Log into the content server (WebCenter) by opening a browser to https://host:port/cs/ where host and port are specific to your deployment
- Expand “Browse Content” on the left navigation
- Click “Contribution Folders” in the navigation tree
- For this demo we will put our data into a folder called “Integration” so I will create that folder by clicking the New Item dropdown the Folder
- Provide the folder name and I also elected to give a title to the folder
Define Trading Community Services
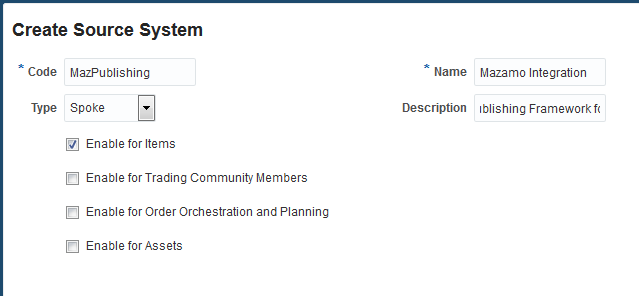
Before we can set up publishing options, we must create a spoke system by defining a trading community service.
- Go to setup and maintenance
- Search on “Manage Trading Community Source Systems”
Define publishing options for the spoke system
Now that we have our spoke system defined, we can set our publishing options. In this step we will export all Root Item subclasses and their basic entities for the current revision.
- Go to setup and maintenance
- Search on “Manage Spoke Systems”
- Click the spoke system name created in the step above
- Navigate to the Publication Options tab
- Define the Entities to publish
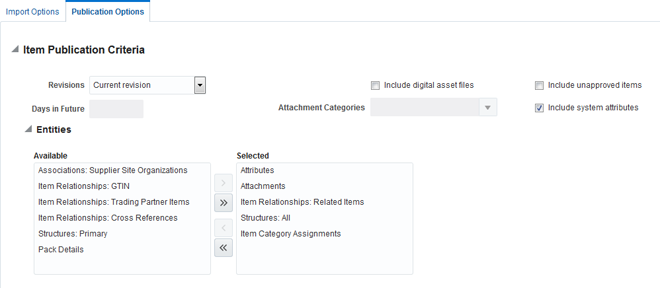
a. Add the Selection Criteria
In the case below we want every type of item.

b. Set Publication Criteria

c. Click Save and Close
Set up the scheduled task
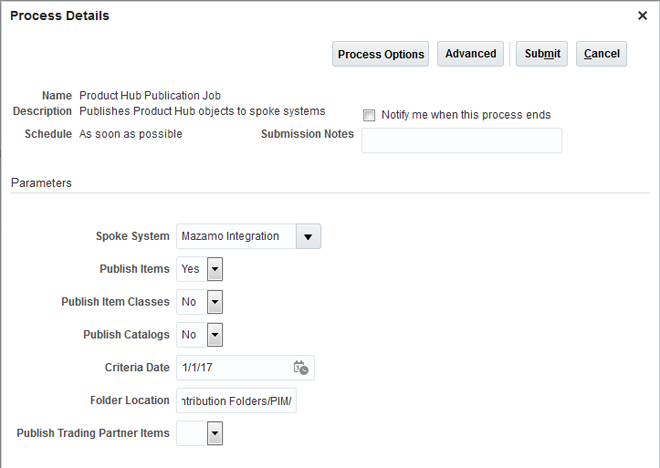
With the publishing options saved it is now time to schedule our publication. There are several options but for the sake of the blog we are just going to publish once, rather than a reoccurring schedule.
- Go to Navigator | Scheduled Processes
- Click New Scheduled Task
- In the Job dropdown, select search
- Search for “Product Hub Publication Job”
- Highlight the job and click ok
- Click ok on the Select Job to close the dialog
- Process Details Dialog will appear
- Select the new Spoke system
- Select yes to publish items and no for classes and catalogs
- Pick a start date. If this was a repeating scheduled job it the next interval would run for everything newer than the last run time
- Select the folder location created above (/Contribution Folders/Integration/)
- Click Submit
8. Wait for your process to finish running
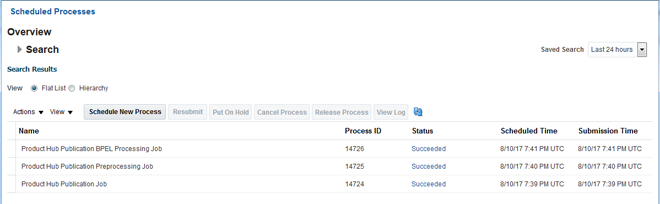
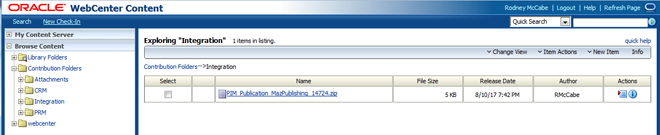
Viewing the results
To see the results of our publishing job, we need to log into WebCenter and view the contents of the ZIP file that was created.
Summary
The Publishing Framework is a great means to perform batch exports of content allowing organizations to opportunity to integrate other enterprise class systems. If the publish job is created as an ongoing task, then it will export data from the last time of execution reducing redundant processing.